
In this article, we’ll explain how to set up shipping zones in WooCommerce efficiently. Learn how to plan your zone shipping strategy to enhance your checkout success and avoid shipping losses.
WooCommerce offers an efficient system for managing the shipping methods with zone shipping, where each customer address is assigned to a specific shipping zone. This system allows you to set shipping costs based on your customer’s location, tailored to the needs of your business.
By properly configuring your zone shipping strategy, you can ensure that shipping costs are fair and aligned with the distance and complexity of each delivery. This not only improves the customer experience but also increases your chances of conversion.
Table of Contents
- 1 What Is a WooCommerce shipping zone?
- 2 How to Structure Zone Shipping in WooCommerce
- 3 Configuring Shipping Zones with Zone Regions
- 4 How to limit shipping zones using ZIP/Postcodes
- 5 How to use Overlapping Strategy for Shipping Zones Simplification
- 6 How to Avoid Shipping Methods Duplicates in Shipping Configuration
- 7 Adding Shipping Methods to Shipping Zones
- 8 How Shipping Zones Order Affects WooCommerce Shipping
- 9 Common Mistakes in Zone Shipping Configuration (Quick list checking)
- 10 How to Debug Zone Shipping in WooCommerce
- 11 Conclusion
What Is a WooCommerce shipping zone?
Zone shipping is key to setting shipping costs in WooCommerce: Each shipping zone in WooCommerce can cover one or more geographical areas, sharing the same shipping rates and conditions. These areas can range from a single neighborhood to multiple continents.
When a customer makes a purchase, WooCommerce assigns the provided shipping address to a single shipping zone. Each shipping zone can contain one or multiple shipping methods, which will be presented to the customer during checkout.
How to Structure Zone Shipping in WooCommerce
The best zone shipping strategy is to keep it simple: the fewer shipping zones you create, the easier it will be to manage and update the shipping costs in the future.
Group areas with the same shipping options and rates to streamline your zone shipping strategy, creating one shipping zone per group and organizing them from the most specific to the most general.
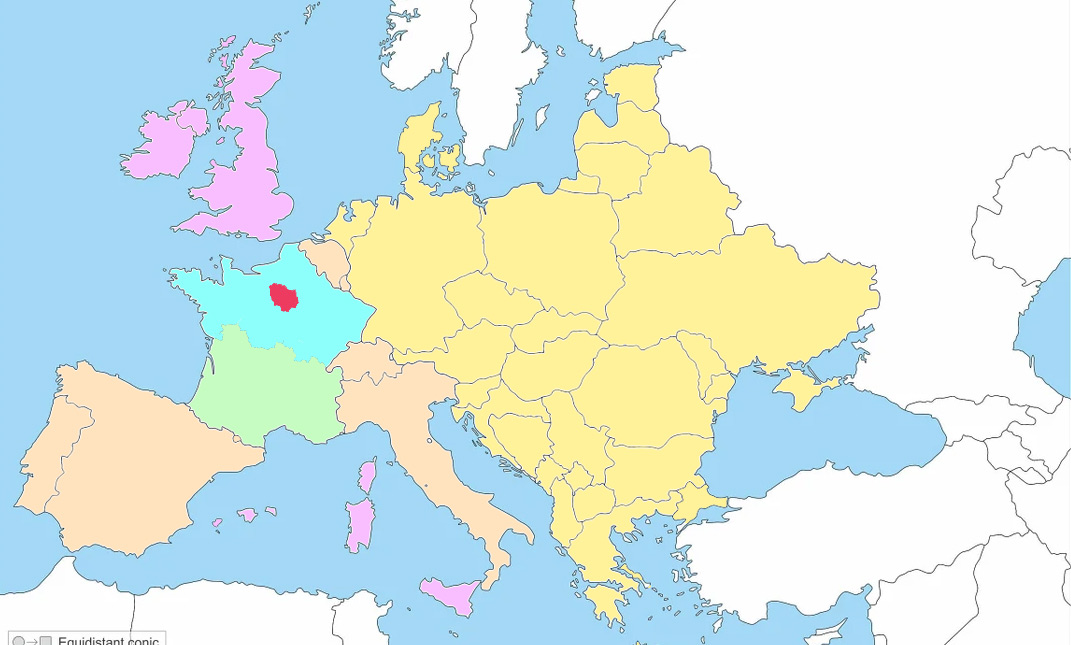
Shipping zones are typically concentric around your shipping point, as shipping costs often increase, and some methods become unavailable with greater distance. A common structure might look like this:
- Your city (i.e. París)
- Your near zone Country (i.e. North France)
- The rest of your country (i.e. France)
- Neighboring countries, islands excluded (i.e. West Europe)
- Islands of neighboring countries (i.e. UK, Mediterranean islands)
- Your continent (i.e. Europe)
However, every case is unique. If two cities have the same shipping conditions, group them into one shipping zone. Or, if the same rates apply across your entire country or a specific cluster of nearby provinces, consolidate those areas into a single shipping zone.
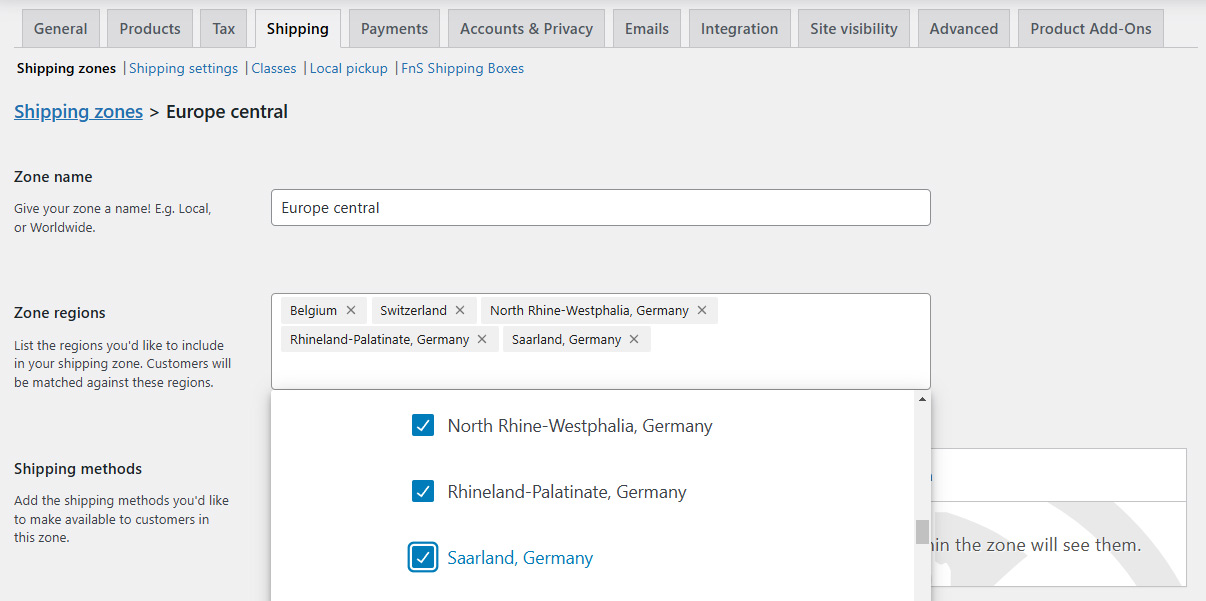
Configuring Shipping Zones with Zone Regions
What are a Zone Region in WooCommerce?
In WooCommerce, any place that you can assign to a shipping zone it’s a Zone Region. So don’t be fooled by its name: Every continent, country, and region is considered a zone region.
The Zone Regions follow this hierarchy: Continent > Country > Region (for some countries, regions may not be available).
For each shipping zone, you can set multiple zone regions as needed.
For each shipping zone, you can set as many zone regions as you need: Selecting a continent will apply to the shipping zone the whole countries and regions within it, so there’s no need to select them individually.
In the same way, if we select a country, there’s no need to select his regions: the whole regions of that country will be assigned to the shipping zone.
Can we set an entire country and a region from the neighboring country? Yes, this can be done: we can mark the entire country + the region from the neighboring country that includes the city.
Can we set half of a country’s regions? Or all but one? Yes, but we’ll need to pick them one by one, and not just select the entire country.
How to limit shipping zones using ZIP/Postcodes
But what if we only want to set a city? We’ll need to set its region and filter by ZIP/Postcodes in the shipping zone (click on Limit to specific ZIP/Postcodes).
Within the selected zone regions, we can filter by postal code. We can do this in three ways:
Specify each postal code
You can set a list of ZIP/postcodes (one by line). This is the clearest way to specify ZIP/postcodes if there is only a few allowed. But if you have too much postal codes to enter, it may be a nightmare to enter it, and always will be an unclear list, susceptible to miss some postcode.
Set a range of ZIP/postcodes
Postal code ranges are a quick and safe way to add a great number of postcodes in an unique line, if all of them are correlative. Are expressed in this format: 90210…99000 (this includes all intermediate codes, but it does not work for alphanumeric codes like the British ones).
Set a wildcard for ZIP/postcodes
To address alphanumeric postal codes like British ZIP/postcodes, you can use wildcards (*). To use it, add first a prefix and follow it with the wildcard in this way: prefix*
Wildcards like CB23* mean: all that start by CB23 will match (CB231 or CB2399, but not CB221 or AB2323).
Two samples of zone region with ZIP/postcode exclusion
Now, let’s imagine that we want to create a shipping zone for the city of Paris, but not for the outskirts of Paris:
- We would set the zone region as Paris, France.
- The postal codes for Paris follow this pattern: 750xx, where the last two digits (xx) correspond to the district or arrondissement number, so we would filter by postal code with 750* or with 75000…75099. Both will work.
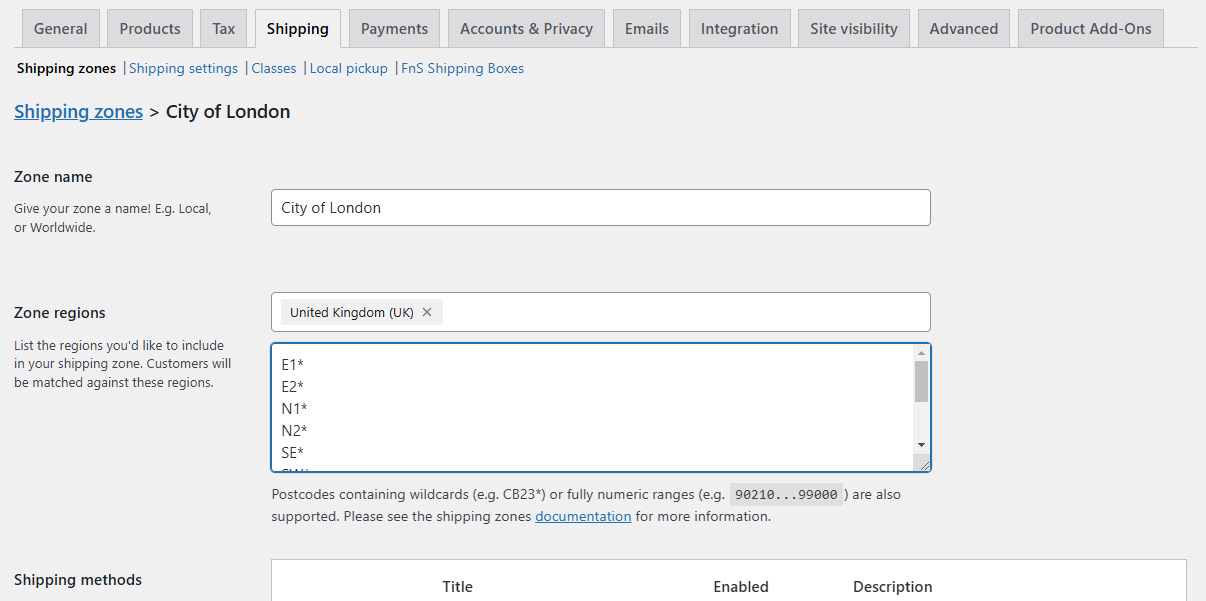
Now, let’s imagine we want to create a shipping zone for all of London. WooCommerce does not have regions set up for the UK, so:
- We would set the zone region as United Kingdom (UK).
- For London: Postal codes that start with E, N, SE, SW, W, WC, EC. But we don’t want to match, for example, Edinburgh, which starts with EH, so we would set: E1*, E2*, N1*, N2*, SE*, SW*, W1*, W2*, WC*, EC*.
How to use Overlapping Strategy for Shipping Zones Simplification
You can simplify zone setup by using an overlapping shipping zone strategy: Imagine we want to set up some shipping rates for Edinburgh, but different rates for the rest of the UK. In this case, we can take advantage of the overlap between Edinburgh and the UK to simplify the configuration:
The simplest zone shipping strategy is to create a first shipping zone named “Edinburgh,” filtering by postal code EH*, and then create a second shipping zone for the entire UK, ignoring the other postal codes.
Edinburgh addresses will match with the Edinburgh zone, and the rest of the UK addresses will match with the second zone. We are taking advantage of WooCommerce’s feature that assigns addresses to the first shipping zone it matches, and only one.
How to Avoid Shipping Methods Duplicates in Shipping Configuration
If a shipping company (Transport A) offers different prices for specific destinations but another company (Transport B) offers the same prices for a wider zone shipping, we must create two shipping zones and duplicate Transport B’s shipping method with the same configuration in both zones. For Transport Company A, the configuration will be different for each method.
Up to this point, this can be done in a standard way with WooCommerce. However, Advanced Shipping Rates for WooCommerce allows you to set different price conditions or inhibit the shipping method (own or third-party) based on conditions like zone region or zip/postcode, just as WooCommerce does. With this premium feature, you can simplify your zone shipping a lot. We explain this in detail in this article: Shipping rates by ZIP/Postcode on WooCommerce without extra Shipping Zones.
Adding Shipping Methods to Shipping Zones
Once you have set up your zone shipping configuration, you can assign one or more shipping methods to each zone. You can create as many shipping methods as you need. They operate with instance logic, so: you can add as many instances of Advanced Shipping Rates for WooCommerce as necessary to set up shipping methods such as:
- Conditional flat rate.
- In-store pickup.
- Methods for light products.
- Express shipping.
- Etc.
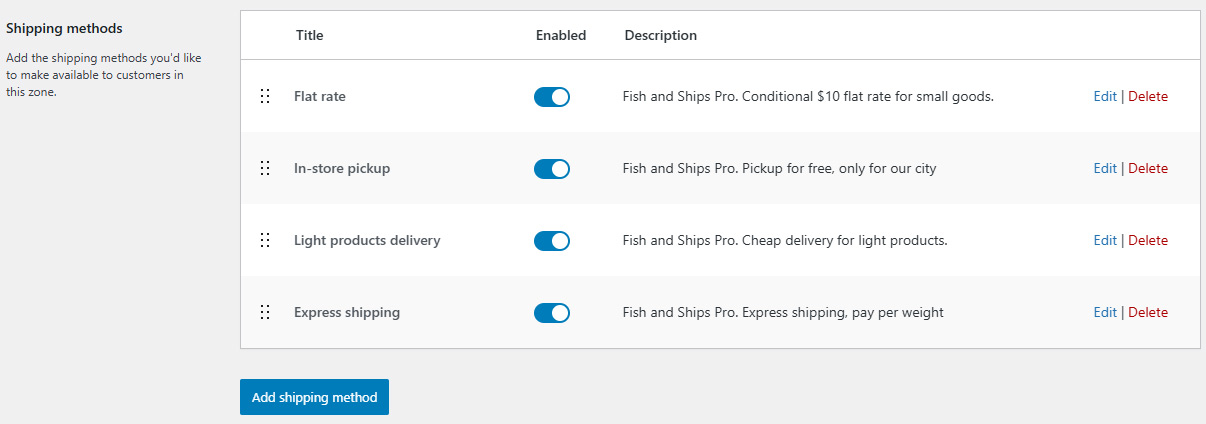
Each method inside a shipping zone will work independently. They can be conditional and will be calculated based on criteria you define, such as weight, price, number of items in the cart, product categories, etc.
Some shipping methods allow for conditional inhibition (in Advanced Shipping Rates for WooCommerce, this is done with the special action “Abort shipping method”). If more than one method is available, the customer will be able to choose the shipping option/rate. If there is only one, will appear as shipping rate, without any option to select, but if none are available, the sale cannot be completed. Be careful with this: in the “Common Mistakes” section of this post, we’ll revisit this issue.
How Shipping Zones Order Affects WooCommerce Shipping
WooCommerce assigns each customer address to the first shipping zone that matches. Therefore, it is important to organize the zones from narrowest to widest, starting with the most specific zones and then moving on to the more general ones. For example, if you have specific shipping methods for a particular city (where your business is located), the setup would be:
- Specific city zone: Here, exclusive rates and methods can be applied for customers from this city.
- County or province zone: Includes shipments within the broader region.
- National zone (country): For shipments to the entire country, without regional limitations.
This structure allows WooCommerce to assign the most appropriate shipping zone to each customer, offering the most suitable shipping methods for their location. If we mistakenly reverse the order, all address will match the “national zone,” while more specific zones will never match any address.
Common Mistakes in Zone Shipping Configuration (Quick list checking)
Shipping zone order is crucial
A frequent mistake is not organizing the zones in order of preference, which means WooCommerce could select a general shipping zone, like the country, before a more specific one like the city or region. This could cause customers not to see the most suitable options for their location.
Check ZIP/Postcode patterns twice
A more difficult error to find is setting up ZIP/Postcode patterns that don’t match as expected. If we limit a shipping zone by ZIP/Postcode, we must make sure we don’t forget any postal codes.
Ensure that you’ve shipping methods inside, and they are activated
Another common mistake is leaving a shipping zone empty (without shipping methods), or the methods not active (you’ll see a strikethrough line on its name). No options available will result in no shipping options being displayed, and the purchase cannot be completed. To avoid this, always verify that each zone has at least one associated method active.
Only one shipping zone will be assigned to each address
Some merchants have also expected addresses to match more than one shipping zone, for example: 1. Paris, 2. France. This will not happen: if an address matches a “Paris” shipping zone, the shipping methods of any other zone will be ignored.
Ensure that at least one method is always available
Finally, when setting up shipping methods with inhibition conditions (e.g., for heavy or large products), always ensure that at least one shipping method remains available in each shipping zone (unless you really don’t want to fulfill certain orders). Sometimes adding generic and expensive alternative methods as fallback is a good strategy.
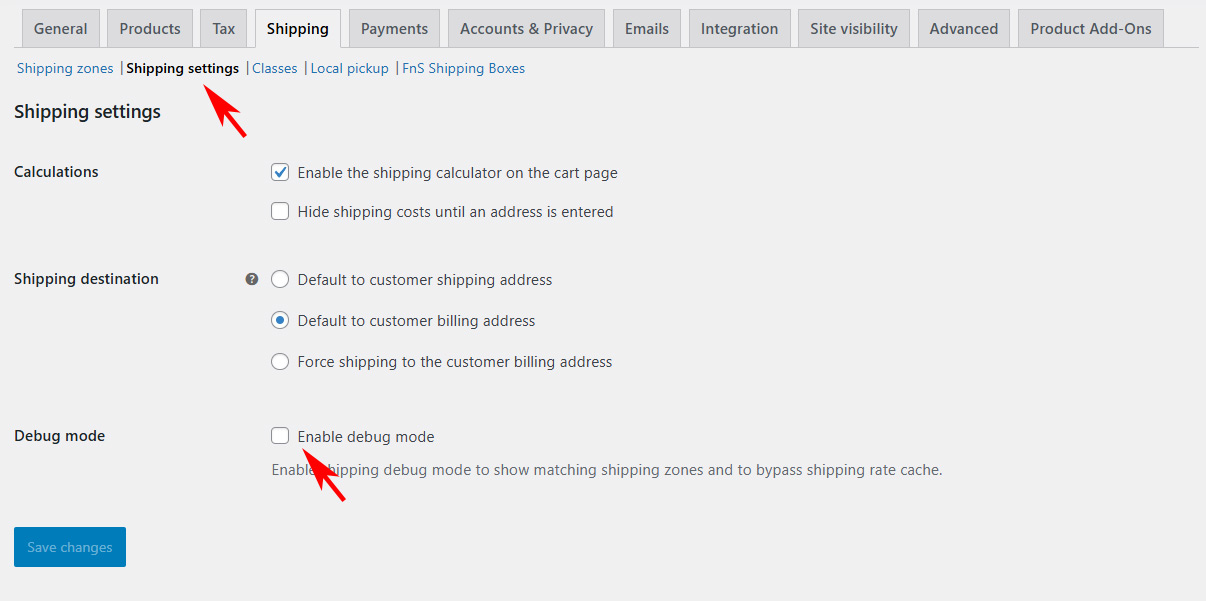
How to Debug Zone Shipping in WooCommerce
Find why some address haven’t unexpected shipping rates or haven’t any shipping method available, sometimes be quite messy.
In this cases, we recommend enable shipping debug mode. This will tell you, while testing shipping addresses, which shipping zone the address is assigned to:
- Go to WooCommerce > Settings > Shipping.
- After selecting the Shipping tab, you will find a section called Debug Options.
- Enable the “Enable Shipping Debug Mode” option. This option will help you see detailed information about the shipping zone selection while the system calculates delivery options during checkout.
Conclusion
In summary, properly configuring your zone shipping in WooCommerce can significantly improve the customer experience and increase conversions for your online store. It can also save time and prevent mistakes when setting up multiple shipping methods now and updating rates in the future.
It can also help you avoid losing money on certain shipments. Organize the zones strategically and define shipping methods based on your business needs and your customers’ locations. With proper configuration, you will ensure that each customer receives the most appropriate and transparent shipping method.